*This post may contain affiliate links, which means we’ll receive a commission if you purchase through our links, at no extra cost to you. Please read our disclosure policy for more information.
Now we’re to the true first step of the actual build process. We say this is the first step you are going to want to complete so you can get all the big cutting of metal done so you can get all the metal shaving cleaned up before starting anything else.
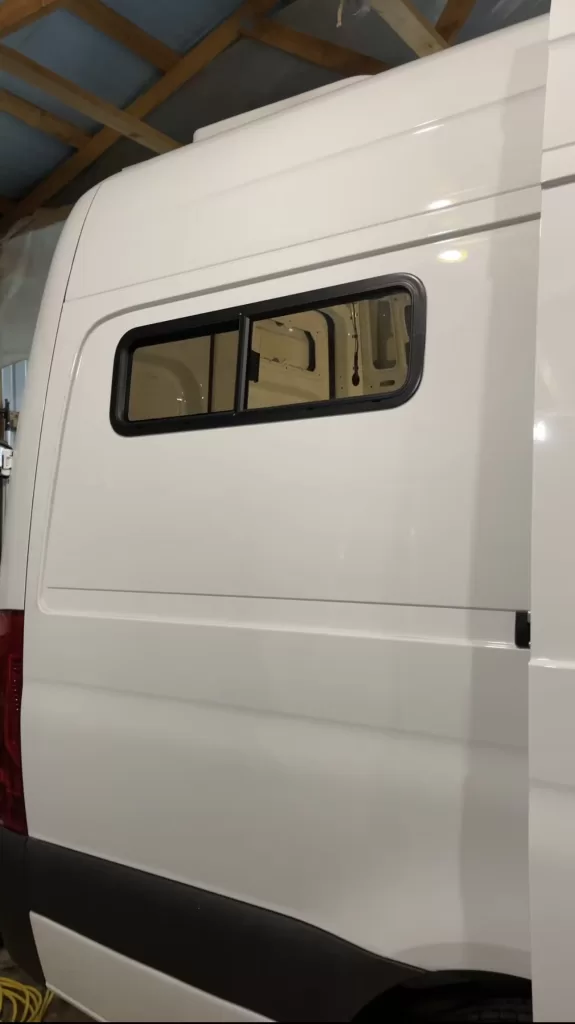
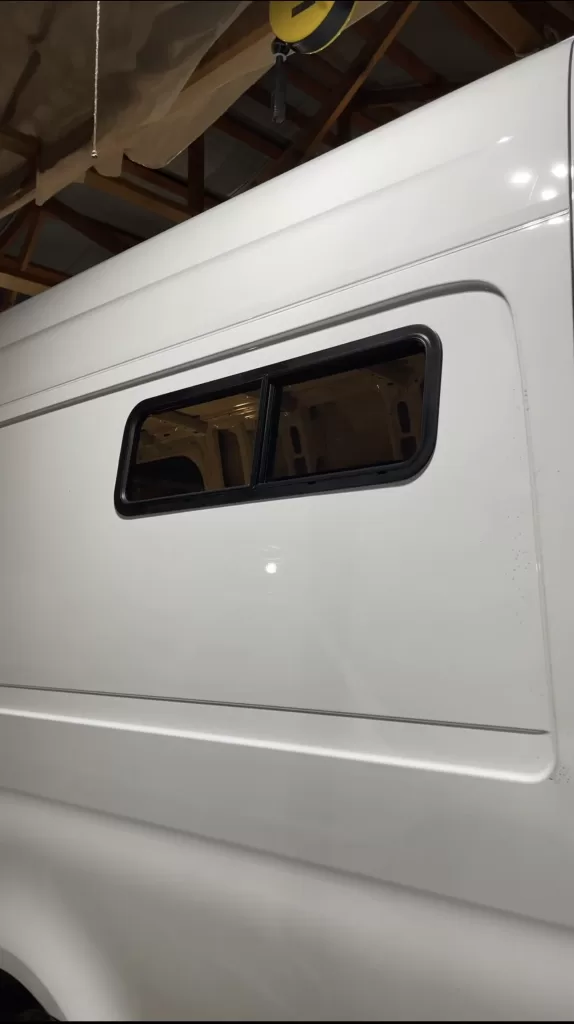
Windows
How many windows do you want? And where should they be placed?
This is a definite preference thing as far as how much light you want to have coming in and how worried you are about the maximum amount of insulation. As far as placement goes, I’m sure you have seen the most common placements for them. We would recommend the sliding door, the back two door windows, and the rear two quarter panel windows.
What kind of windows to get?
We recommend going to vanwindowsdirect.com and choosing from their selection based on your make and model of van. We also recommend getting as many windows that have venting capabilities as you can to maximize airflow in the van. Here are the ones we would recommend:


Installing Windows:
There are plenty of videos on YouTube you can watch if you want to do this yourself but if you feel too nervous there is nothing wrong with consulting someone who has experience doing this because it can seem like a very daunting task to cut so many big holes in the van you just got.
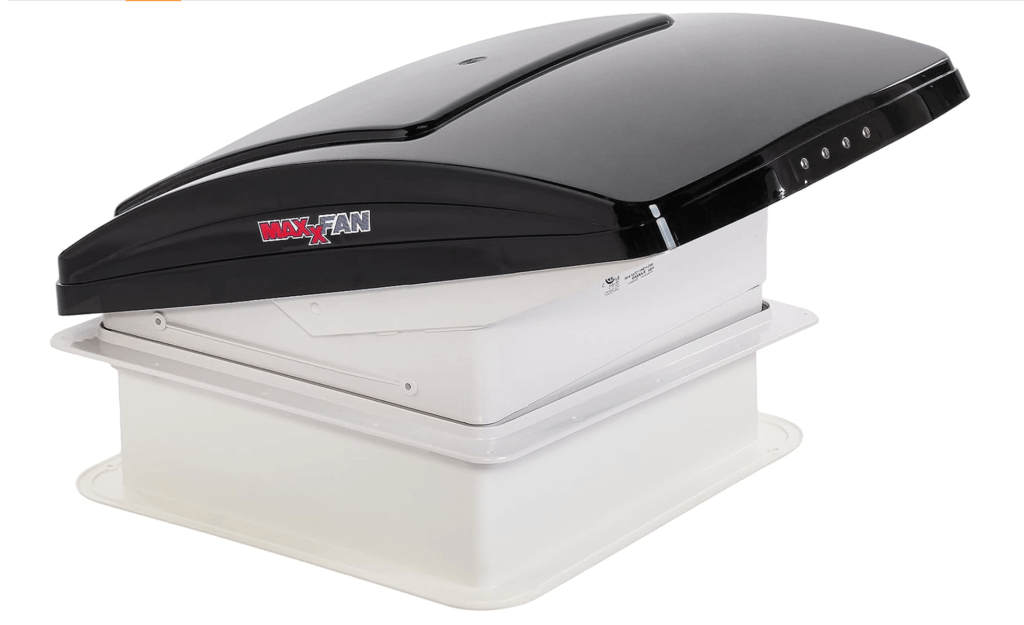
Vent Fans
In our opinion one of the best things you can put into your van is a vent fan. We literally have ours running 24/7 paired with our venting window to have fresh air constantly circulating through the van. These fans are a great way to cool the van down but also rid of cooking smells, and steam from your hot shower, help prevent excess moisture from staying in your van, and can even be reversed to blow fresh air down into your van. Here are some different price options to fit your budget, but in our opinion the Maxxair Fan Deluxe is absolutely worth every penny.
- This is the Maxxair Deluxe 7500K with a remote. This fan allows multiple different speed settings with the capability to reverse the fan direction at a very very low power draw (max 12 watts at 12v). It allows you to control from your bed with the remote and it opens and closes electronically.
- Our personal favorite features include: you can drive with the fan open and on, the fan can remain open and on during rain and even heavy storms with no worry of anything leaking inside, and when closed it barely sticks up off your roof.
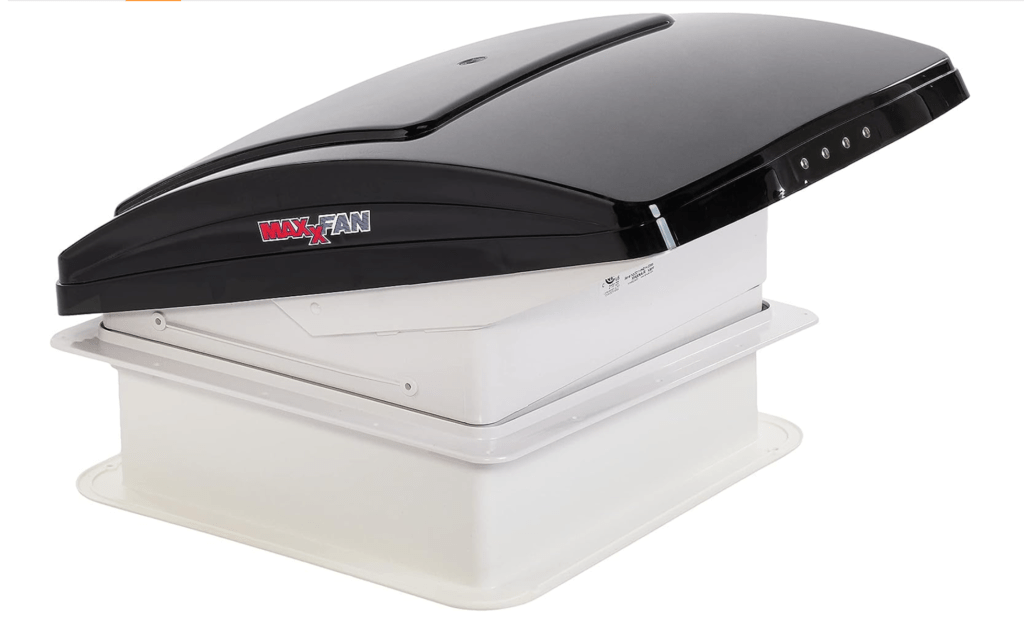
- This is the Maxxair Deluxe 6401K. This fan looks very similar and still has the great feature of being able to operate during driving and rain plus the same great low profile sleek design at very low power draw (max 12 watts at 12v). The key differences are no remote, manually open and close, only 4 speeds, and about $140 dollars less than its big brother, the 7500K.
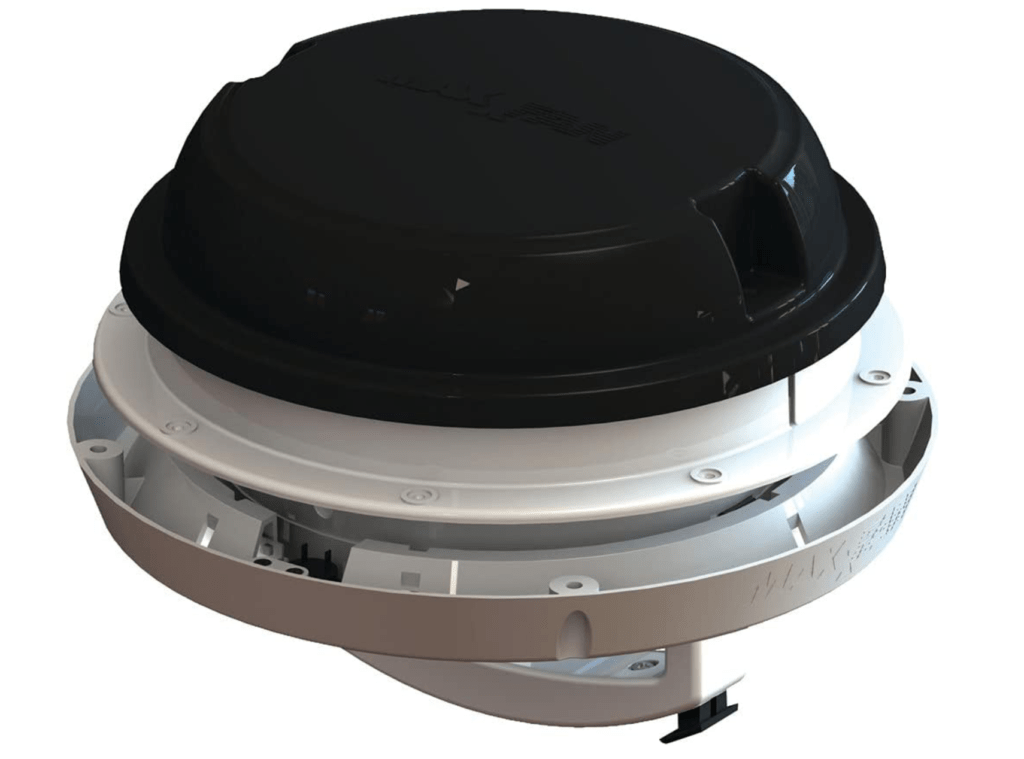
- This is also a Maxxair fan but a dome style. This fan is a much smaller option with fewer features but does take up less space inside and roof space. And can also still be operated in motion and during rain.
There are many other options and brands for roof fans but when looking at the prices and their features, these are the best bang for your buck. Some other fans for about the same price don’t allow you to use it in motion or during the rain. And you may think, why do I need to worry about using my fan while driving? The answer is sometimes it’s really that hot outside but the more common is you forget the fan is on and it’s nice to not have to worry about the fan or van getting damaged. And just because its raining doesn’t mean you don’t still need to cook, shower, or just want a nice breeze flowing through your home. So in other words we didn’t add any of the other fans to this list because in our opinion they aren’t going to work near as well and, in our opinion, are waste of money especially when they aren’t any cheaper.
Air Conditioners
You may be thinking “is this really necessary?” and this is where you will find a lot of mixed reviews and opinions. There is also a lot more that goes into having an air conditioner than just if you want one or not. I want to start by saying we aren’t talking about the air conditioners you buy for a traditional RV that is powered by your traditional 120v system because chances are if you are building a van you do not want to spend all your time at a campground or having to plug into shore power to use anything in your van. (Not at all saying that this is a bad thing and if this is your style, we come in peace. We are just focusing more toward the off-grid style of van builds here).
Air conditioners use a good amount of power, even the 12v ones we will list below. With that being said if you want to have one here are a few things to consider before committing
- Are you willing to add more batteries to your system to accommodate?
- Do you plan on being in a hot enough climate to need one?
- Do you have pets you need to make sure to stay cool?
If you plan on chasing cooler, more comfortable climates, or being at higher elevations, don’t want to invest the money in the unit itself and the extra batteries to supply it, and/or do not have pets to worry about in the heat then it may be best to install a second fan for more natural airflow or a skylight as another option.
Don’t get us wrong we love our AC Unit and definitely don’t regret it. It gives us peace of mind knowing we can go somewhere even if it is hotter, plus knowing if we need to go somewhere that our dog can’t, we can still keep her comfortable. But we also understand that it comes with a hefty added cost to buy and use practically.
Here are our top picks for 12V AC units in different price ranges:
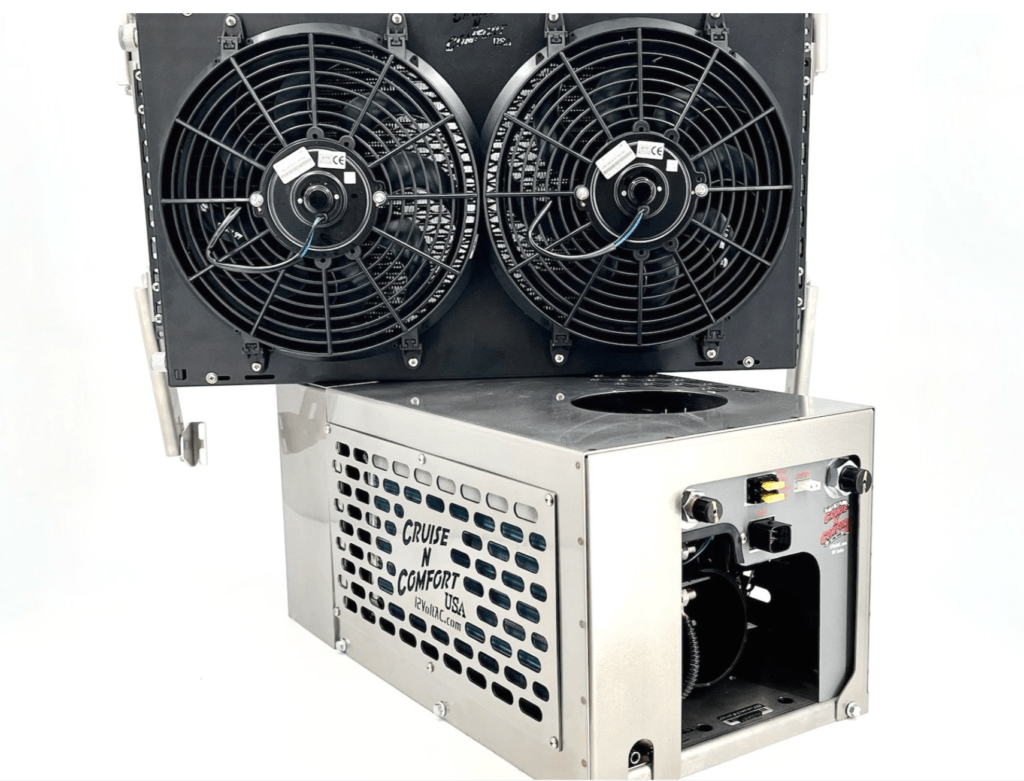
- Most expensive option
- Most extensive installation option.
- Mounts under the van, which frees up valuable roof space on your van for solar panels or a roof deck.
- It can be ducted to multiple locations so you can have multiple vents.
- The cooling capacity is 10,000 BTU and uses between 38-55amps at 12V. Cost is around $5,000.
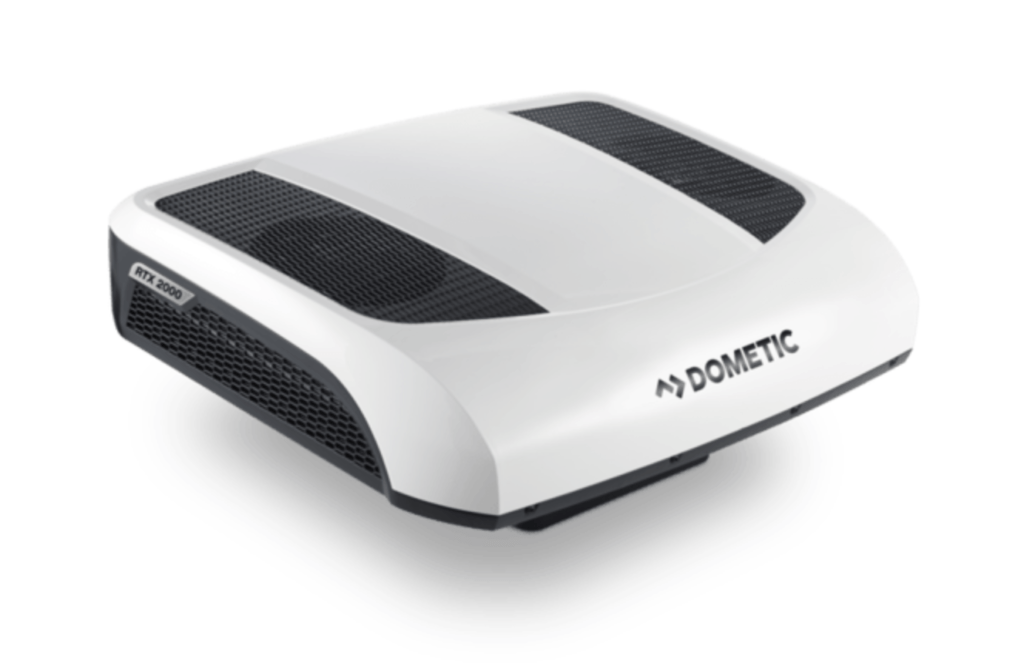
- Sleek low profile look
- Very quiet
- Very efficient
- A little pricey, but well worth it in our opinion (we have it in our van)
- Very easy to install
- The cooling capacity is 6,824 BTU and uses between 10-58 amps at 12v. If you use the eco mode it only draws 19amps which makes it a very low power draw for an AC unit.
- Cost is around $2500.
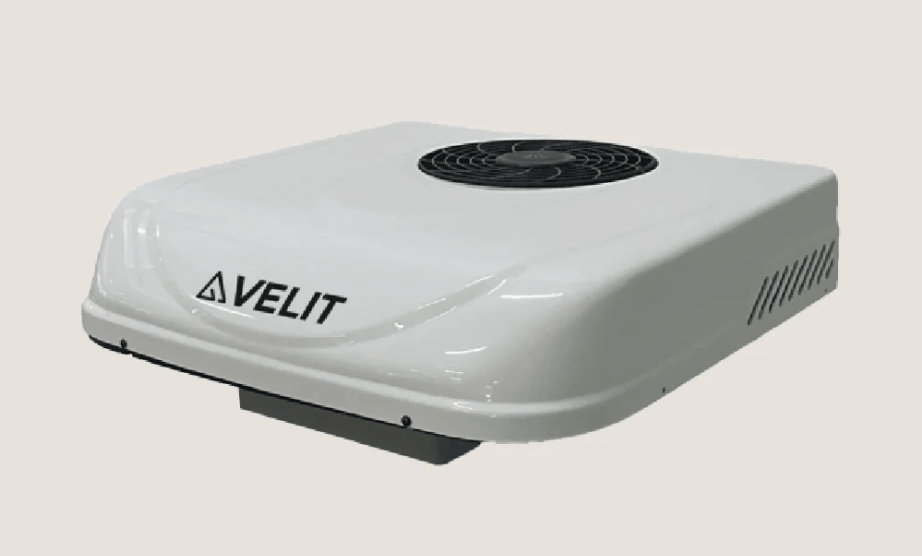
- Good unit for the price.
- Slightly higher profile than the Dometic
- Has a higher power consumption than Dometic (also no eco-mode).
- The cooling capacity is 8,000 BTU and uses between 20-60 amps at 12v.
- Cost is around $1,600.
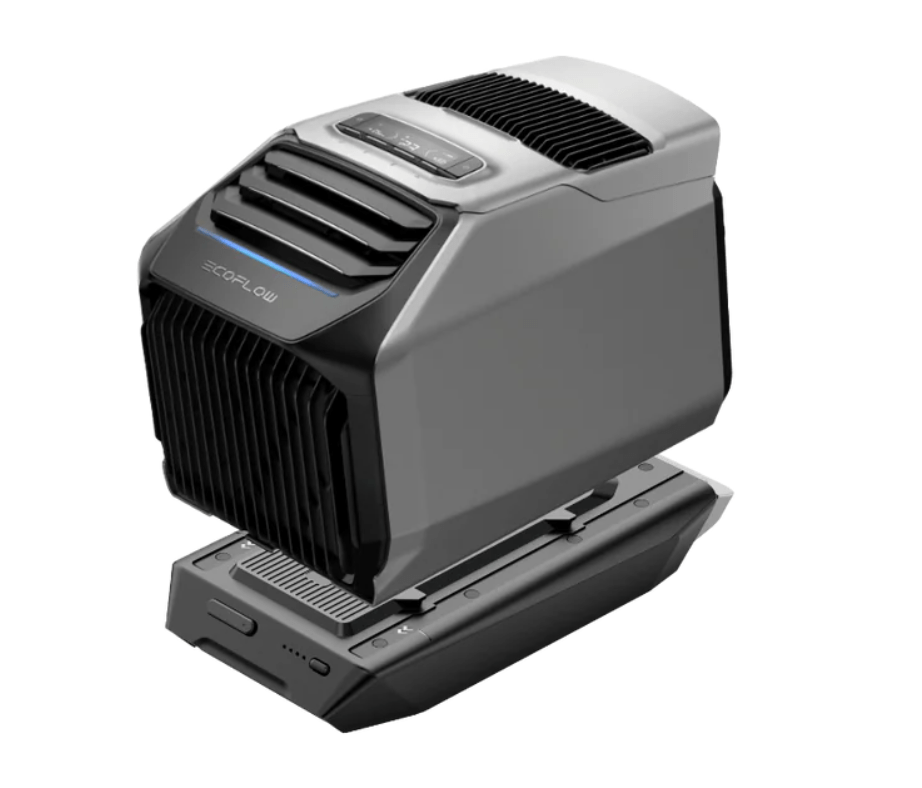
- Good option if you want to have something you don’t have to commit to cutting holes in your van or even not sure you would need it that often.
- Battery-powered – you can purchase solar panels and an extra battery to use it longer.
- Price can add up by adding these on and if you need to plug the batteries in to charge they will use a significant amount of power.
- This option may be less stressful and easier for some to install & is on the lower end of pricing.
- The cooling capacity is 5100 BTU and has an 8-hour battery life
- The cost is around $1,300.